https://www.asustor.com/online/College_topic?topic=324
COURSE OBJECTIVES
Upon completion of this course you should be able to: \1. Install a certificate to your ASUSTOR NAS. \2. Use HTTPS to ensure communication security between your NAS and client devices.
PREREQUISITES
*Course Prerequisites:* None
*Students are expected to have a working knowledge of:* N/A
OUTLINE
2.1 Enabling HTTPS for the ADM management interface
2.2 Enabling HTTPS for the Web server
3. Adding a Signed Certificate
3.1 Manually importing a certificate
3.2 Getting a certificate from Let's Encrypt
1. Introduction
HTTPS (also called HTTP over TLS, HTTP over SSL, and HTTP Secure) is a protocol for secure communication over a computer network which is widely used on the Internet. HTTPS consists of communication over Hypertext Transfer Protocol (HTTP) within a connection encrypted by Transport Layer Security or its predecessor, Secure Sockets Layer. In its popular deployment on the internet, HTTPS provides authentication of the website and associated web server with which one is communicating, which protects against man-in-the-middle attacks.
2. Enabling HTTPS
*2.1 Enabling HTTPS for the ADM management interface*
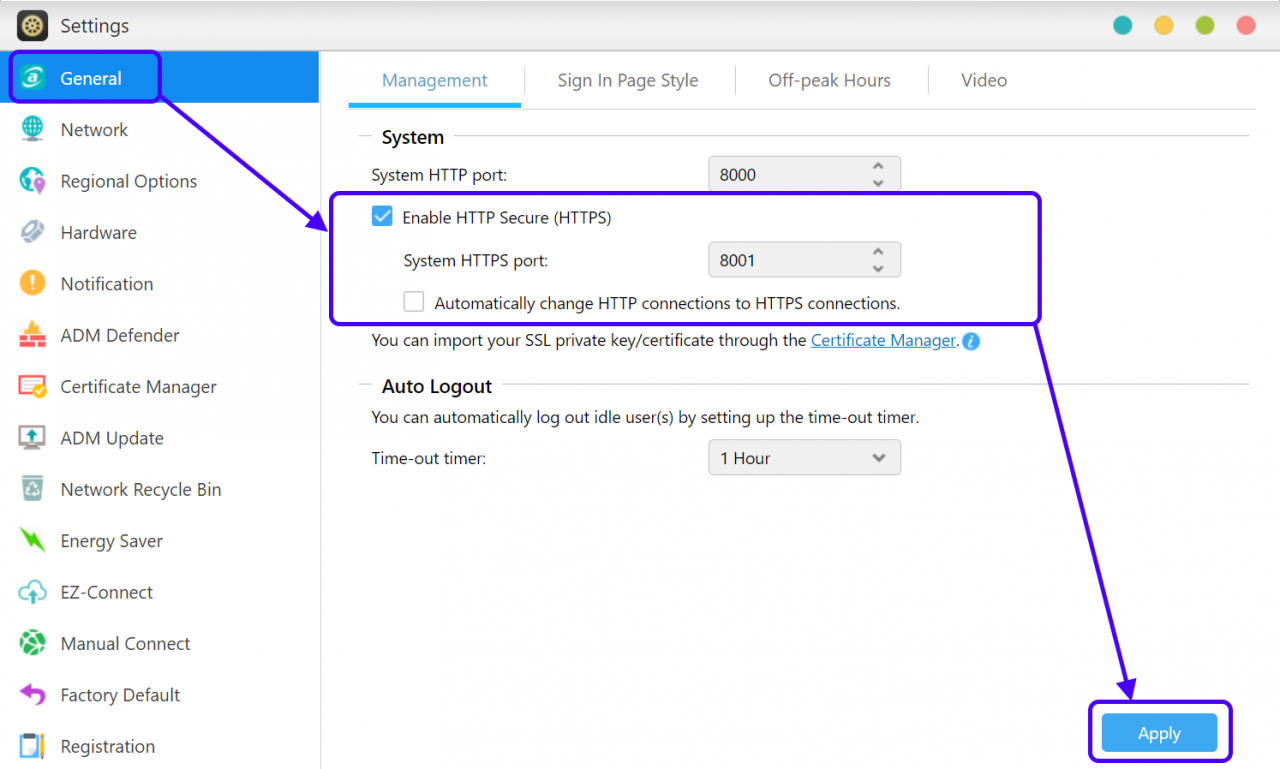
Log in to ADM using an administrator account. Select [Settings] [General] [Management]. Select the [Enable HTTP Secure (HTTPS)] checkbox. The default HTTPS port for ADM is 8001. You may configure another port if you wish. Select the [Automatically change HTTP connections to HTTPS connections.] checkbox. Click on [Apply] to make the configurations effective.
*2.2 Enabling HTTPS for the Web server*
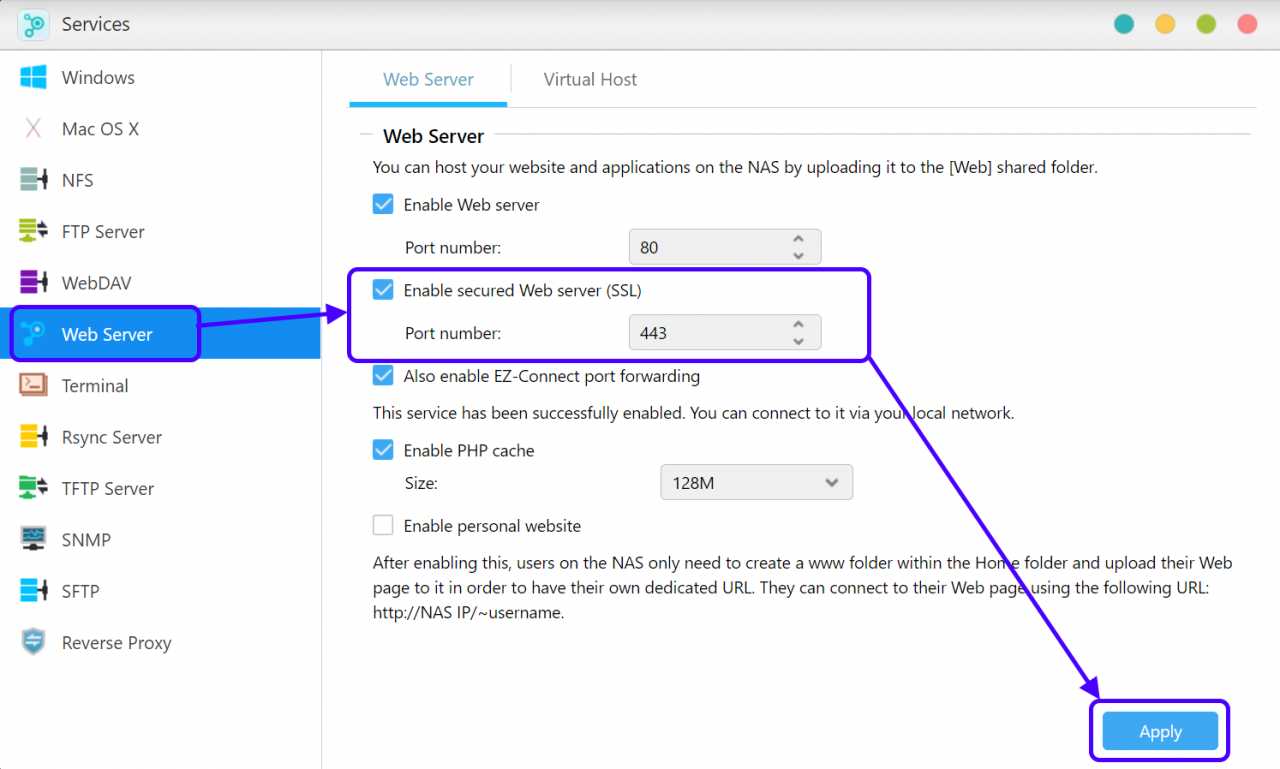
Log in to ADM using an administrator account. Select [Services] [Web Server]. Select the [Enable secured Web server (SSL)] checkbox. The default port for Web Server HTTPS is 443. You may configure another port if you wish. Click on [Apply] to make the configurations effective.
3. Adding a Signed Certificate
There is a default ASUSTOR signed certificate built into ADM, but browsers will not trust this certificate because it is not signed by a third party. Therefore, when you connect to your ASUSTOR NAS using HTTPS, you will see a privacy error message. (Shown in the graphic below using Google Chrome as an example)

You can click on the "Proceed to…website (unsafe)" link to skip past page and log in to ADM. However, in order to correctly verify the identity of your ASUSTOR NAS and ensure secure communication, you must get a signed certificate from a trusted certificate authority and import it into ADM.
*3.1 Manually importing a certificate*
If you already have a registered domain name, and have a signed certificate from a certificate authority, you can use the following steps to import the certificate into ADM. (You can skip this part and process to 3.2 Getting a certificate from Let's Encrypt if you don't have a registered domain name and wish to use CloudID.myasustor.com)
STEP 1
Log in to ADM, select [Settings] [Certificate Manager] and then click on [Add].

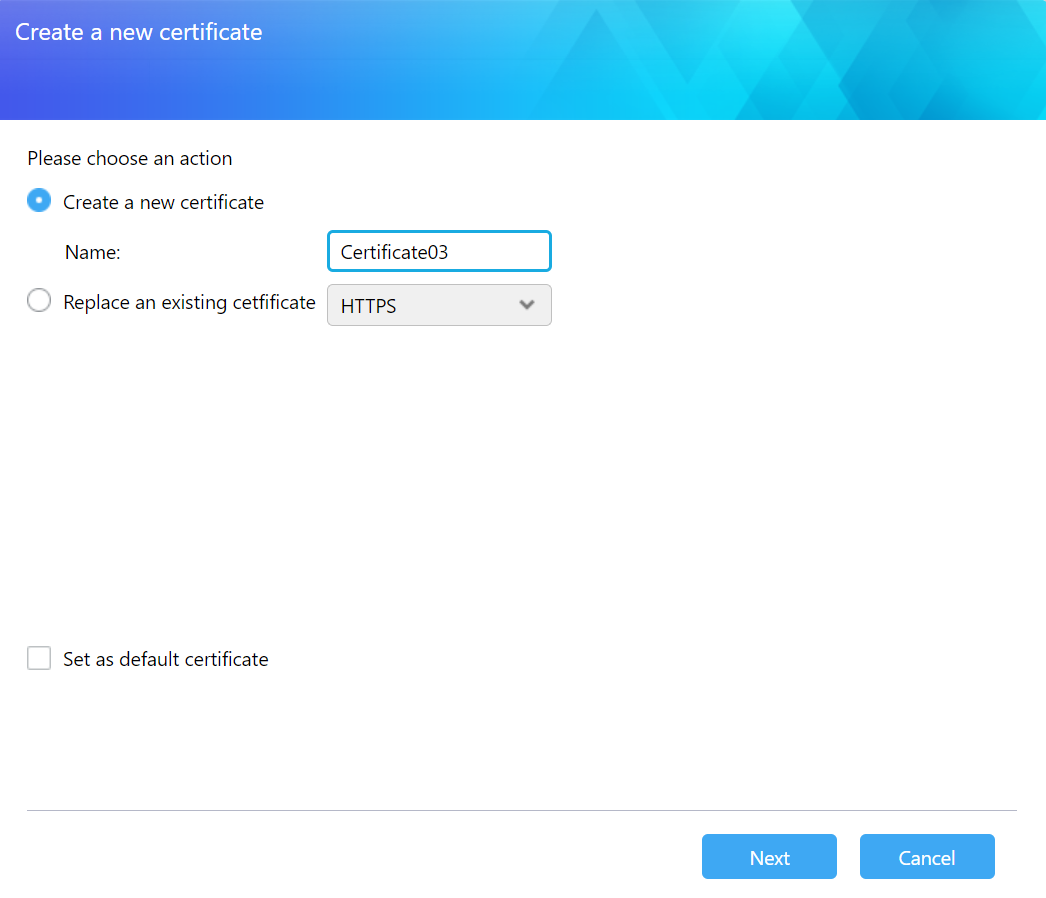
STEP 2
Enter a name for the certificate and then click on [Next].
STEP 3
Select [Import your SSL private key and certificate] and then click on [Next].

STEP 4
Use the [Browse] buttons to select the [Private Key], [Certificate] and [Intermediate Certificate] (optional) from your local machine and then click [Finish].

*3.2 Getting a certificate from Let's Encrypt*
Let's Encrypt (https://letsencrypt.org/) is a free, automated, and open certificate authority (CA), that provides a trusted certificate for free to anyone who owns a domain name. Let's Encrypt issued certificates are recognizable by all Web browsers. The Certificate Manager in ASUSTOR NAS can directly connect to Let's Encrypt to generate a valid certificate and install it automatically. This helps you to enhance NAS security with an SSL connection in a fast and easy way at zero cost.
You can use your Cloud id and .myasustor.com together as your domain name.
STEP 0
If you use ASUS router or some of the router that use 80 port by default, you have to manually go to router settings to set up 80 port with your NAS internal network IP to enable Let's Encrypt.Instructions: https://www.asustor.com/knowledge/detail/?group_id=1006
(You can skip this part and process to STEP 1 if you are using non-ASUS router and the 80 port is not used by default.)
Attention:Before proceed to STEP1, please help to check the WAN IP + 80 port is working. Sometimes even setting up port in router like the FAQ but the router itself doesn't support.
1.You can go to Manual Connect to find you WAN IP

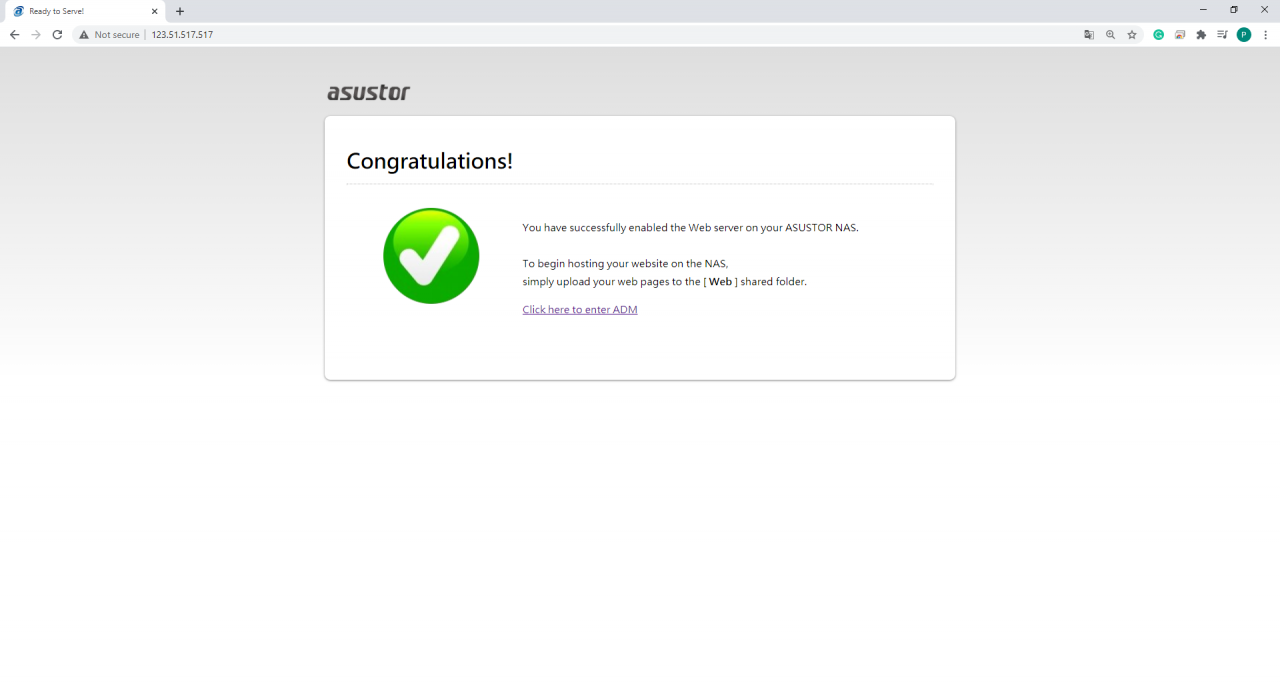
\2. Type WAN IP and :80 in your browser address bar.

\3. If you can see the Congratulations page, then you can proceed to set up Let's Encrypt.
STEP 1
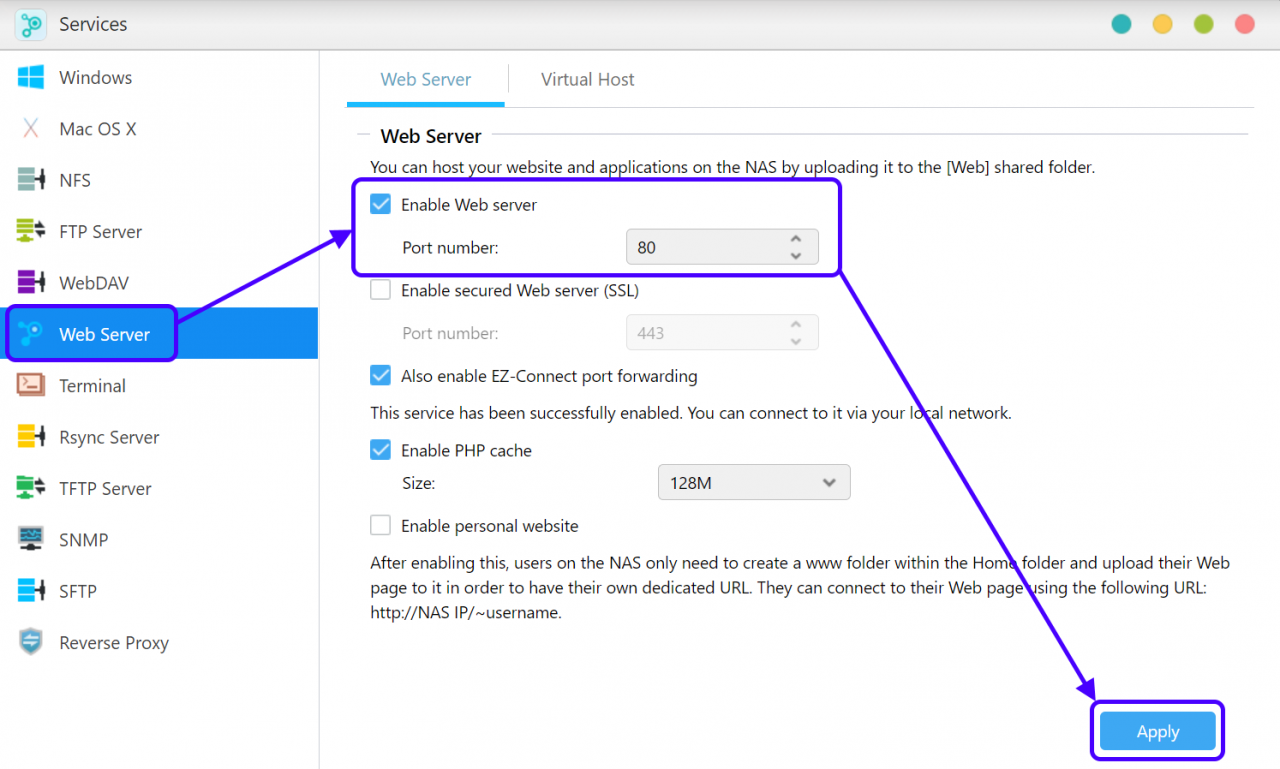
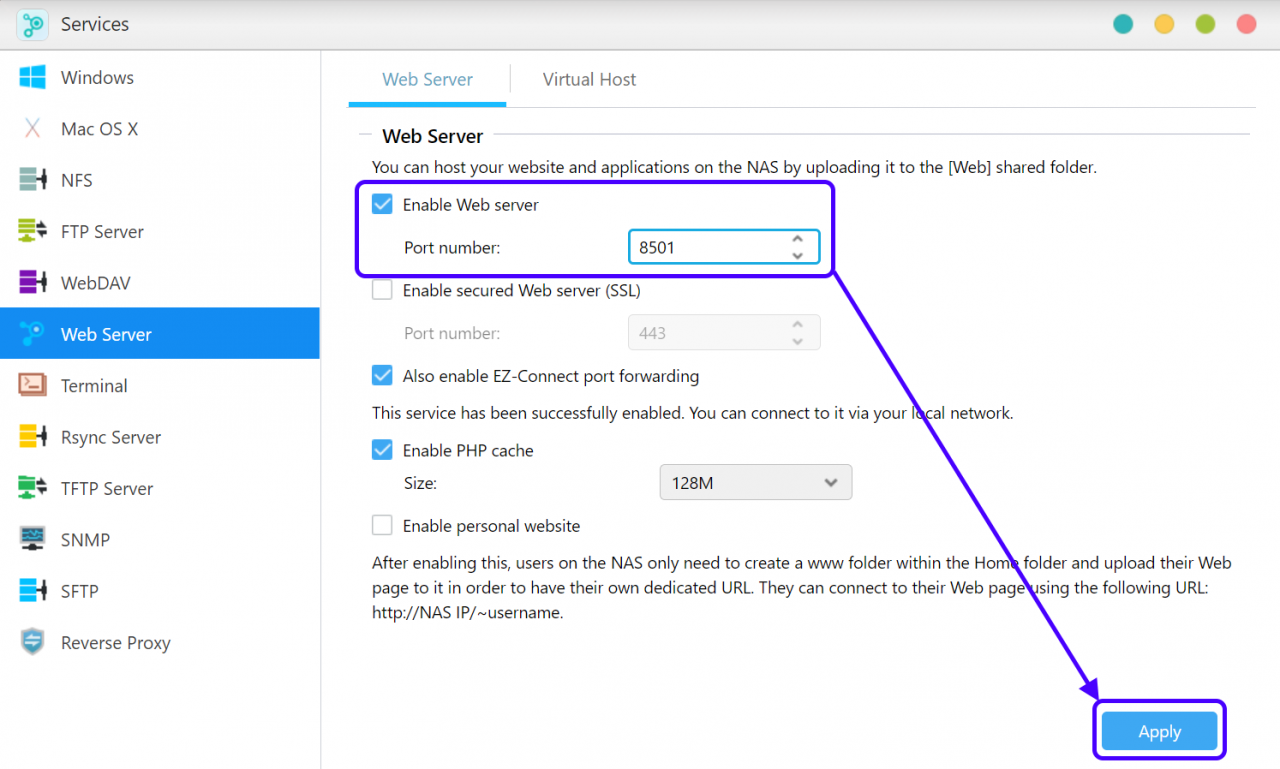
Log in to ADM, select [Services] [Web Server] and select the [Enable Web server] checkbox. Make sure to use the default port 80. If you have followed STEP 0 to set non-80 port in ASUS Router settings previously, you have to change the web server port as well; for example, we use 8501. Do not check the [Enable secured Web server (SSL)] checkbox.
If you have followed STEP 0 previously, please check next image to change the web server port to any non-80 port.
STEP 2
Select [Settings] [Manual Connect] [EZ-Router] and check if Web service is added to the [Port Forwarding] list.
STEP 3
If your router does not support EZ-Router, please manually go to the router management interface to configure port forwarding.Note: Before Let's Encrypt assigns certificates, it will use port 80 to execute domain verification. Therefore, please ensure that your NAS and router have port 80 open in order to allow connections from the Internet.
STEP 4
Log into ADM, select [Settings] [Certificate Manager] and then click on [Add].
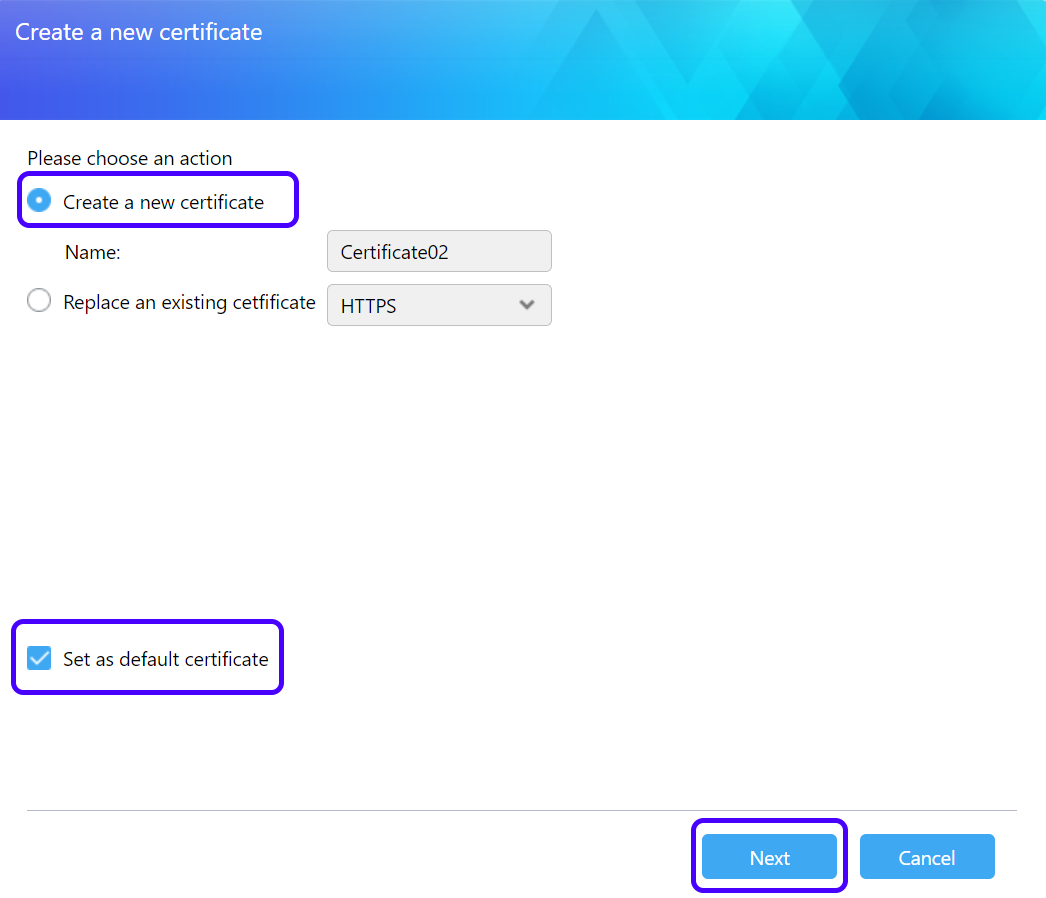
STEP 5
Enter a name for your certificate, set as default certificate and then click on [Next].
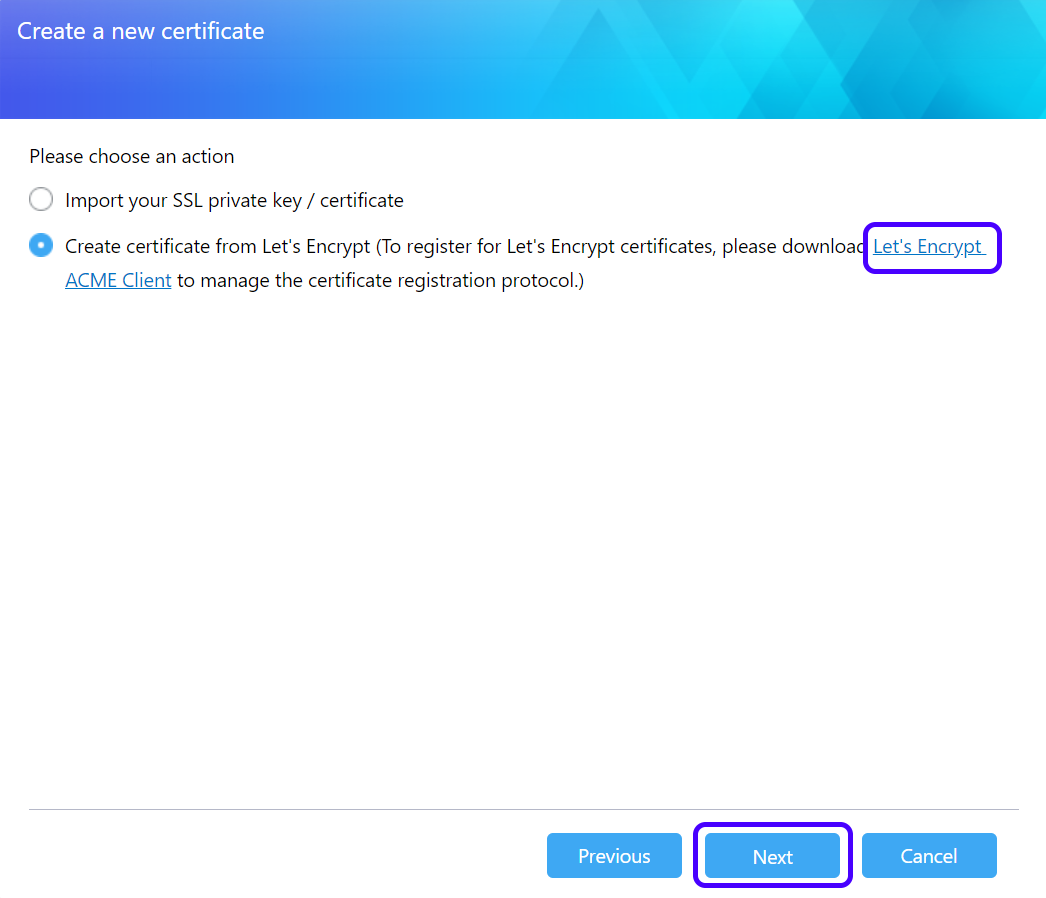
STEP 6
Select [Create certificate from Let's Encrypt] and install Let's Encrypt ACME Client. Then, click on [Next].
STEP 7
Enter the following information:[Domain name]: Enter the domain name registered with the domain provider. For the use of myaustor.com, you can type your Cloud id and .myasustor.com together. For example, cloudid.myasustor.com.[E-mail]: Enter the e-mail address used to register for the certificate. Here you can use your NAS registration email if you want to use it with myasustor.com.[Subject Alterative Name]: If this certificate needs to be used on multiple domains, please enter the names of the other domains. (Not a necessary item.)[Update automatically when certificates expire.]: Let's Encrypt issued certificates will expire after 90 days. By selecting this option, ADM will automatically renew the certificate before the expiration date, if domain verification is successful. Please ensure that your NAS and router have port 80 opened in order to allow for certificate updates.Click on [Finish]. The Let's Encrypt certificate will be imported to ADM.

Note:
If you use http, the webpage will not be trusted by the browsers. You have to use https like [ https://cloudid.myasustor.com:8001/ ]